Batch Submission of Data - Using the ENSC
Using the ENSC
The ENSC is at https://enservices.epa.gov/login.aspx. There is also a button on the AQS Batch Form Area that will open this web page.
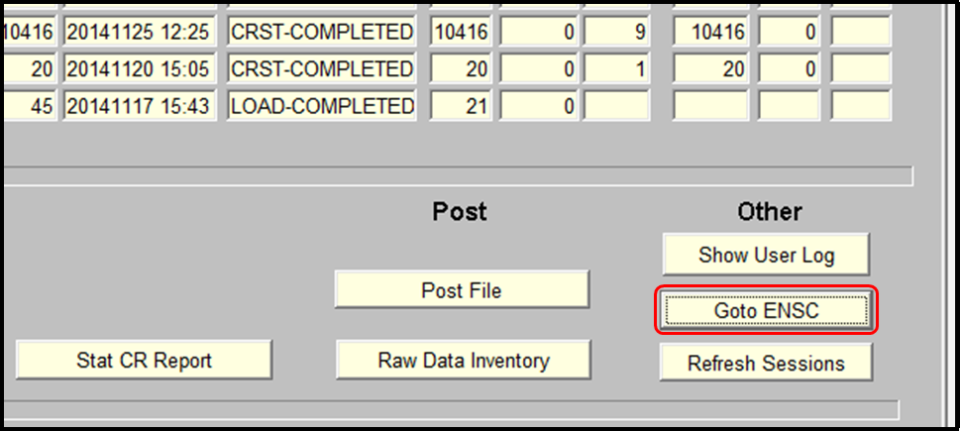
A file can be submitted through an organization's node to AQS via the Exchange Network with processing instructions (The user's IT department will have to set this up) or a file can be submitted manually.
For manually submitting a file the following instructions are provided.
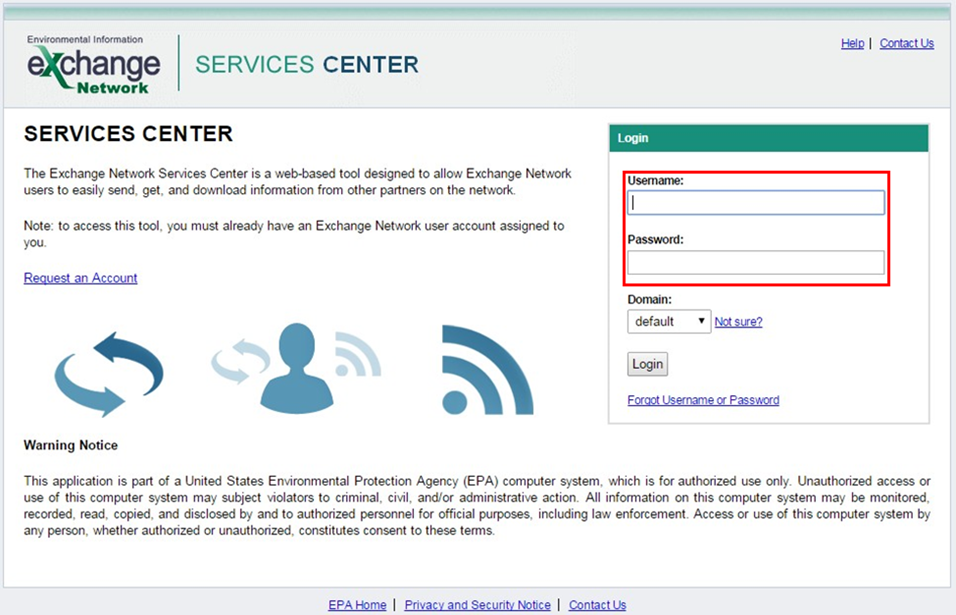
The user will login to ENSC with the production Exchange Network account and password.
Some useful training videos on using the ENSC for AQS:
- Logging into ENSC - Training Video
- Using the ENSC to Submit Files to AQS - Training Video
- Interactive Training - Batch Loading Through the ENSC
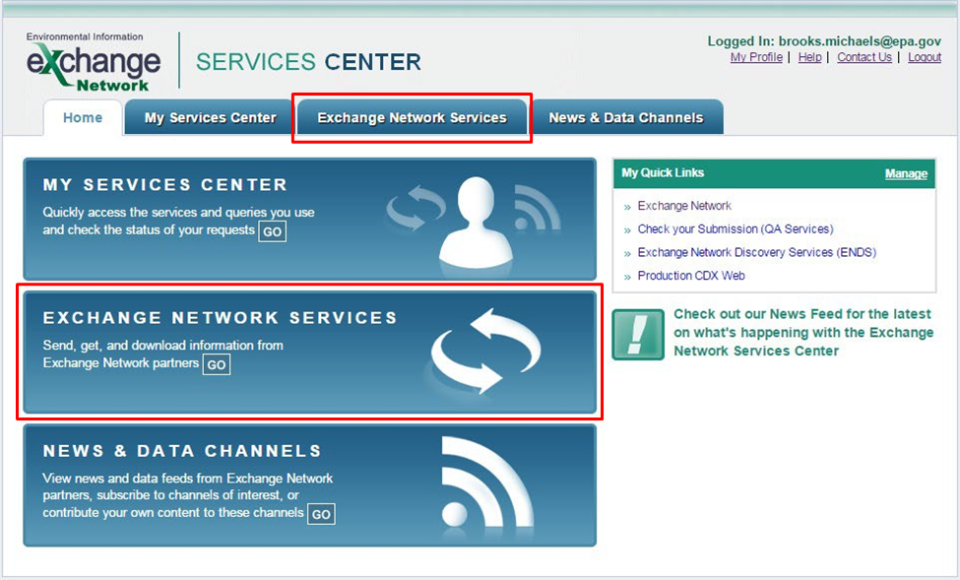
The first time a user logs into the ENSC they will need to add the AQS connection service to their list of services. In order to add the AQS connection the user will select the Exchange Network Services tab or click the 'Go' button on the Interactive Window are labeled EXCHANGE NETWORK SERVICES.

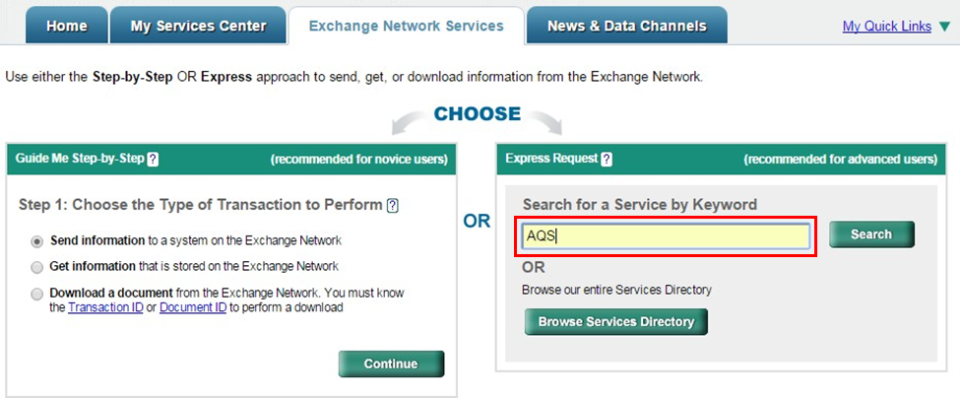
At this point the user will type AQS in the search field of the Express Request box.
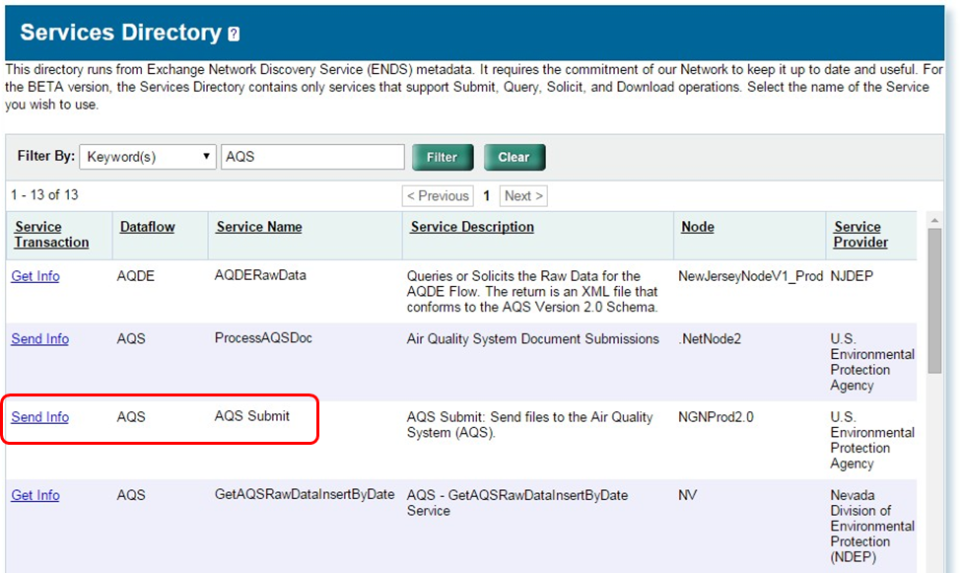
The Service Directory window will open displaying a list of choices. The user will click the Send Info link for the AQS Submit service.
The user will then complete the Express Request form.
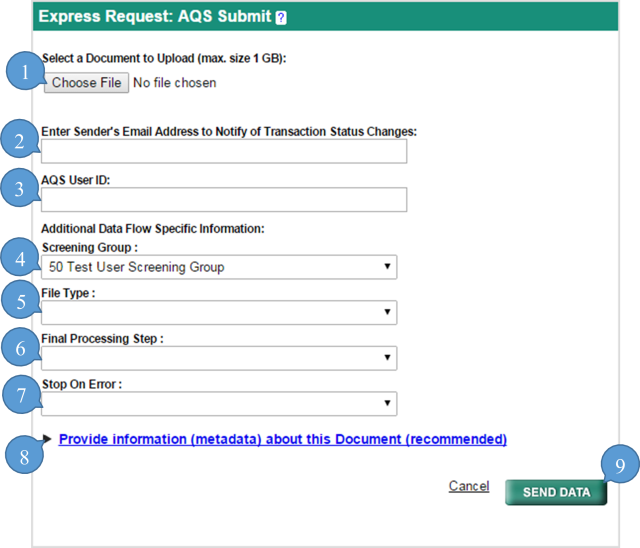
- The Choose File button allows the user to select a document from their local computer or network.
- File transfer information will be sent to the email address the user inputs into this field. The user can input one or multiple email addresses (this field is optional). Multiple email addresses must be separated by commas.
- The user must input the AQS User ID assigned.
- The user will select, from a drop down menu, the screening group the user is submitting data for.
- The user will select the appropriate file type (format) from the drop down menu.
- AQS text transactions (MA, RD, etc.) are flat files.
- The Final Processing step is where the user provides AQS with instructions on how far to process the file before stopping and waiting for the user to log on and review/complete processing.
- Stage copies the data from the submitted file into the AQS database, but does no processing of the contents of the file. If an error is reported during the stage process, the problem must be fixed in the user's data file and resubmitted.
- Load moves the submitted data into the AQS database and performs field validation (i.e. is each field on each transaction valid) and relational checks (i.e. is pre-requisite data present). If errors occur during the load process, the user can fix the error in AQS via the Correct Forms or the user can correct the problem in their own database and start the process over.
- Some data can complete the load process while other data has errors.
- For Raw Data Only: AQS runs a variety of statistical tests on the data to look for statistical anomalies (outliers). The user will receive warnings (not errors) if the data is flagged by a statistical check.
- For Raw Data Only: Post changes the status of the data from where it can only be seen by members of the user's screening group to where it can be seen by any AQS user. Also, all of the relevant summary values will be updated in this step.
- The user cannot have an error during the Post process.
- To process the file as far as possible, select Post.
- The user will select either 'Yes' or 'No' for the Stop on Error processing command.
- Yes prompts AQS to examine the results of the stage and load programs (both for errors and warnings) and stop any additional processing of the file if there are any errors or warnings in the data.
- No prompts AQS to process all the data it can through the final processing step you selected.
- The user can optionally provide additional data by expanding the Provide information (metadata) about this Document, but it is not necessary. AQS will not store this additional metadata.
- After the user has entered values for all of these fields the user should click the Send button to begin the AQS submit process.
After the user clicks the Send button the 'Request Received!' screen will appear.
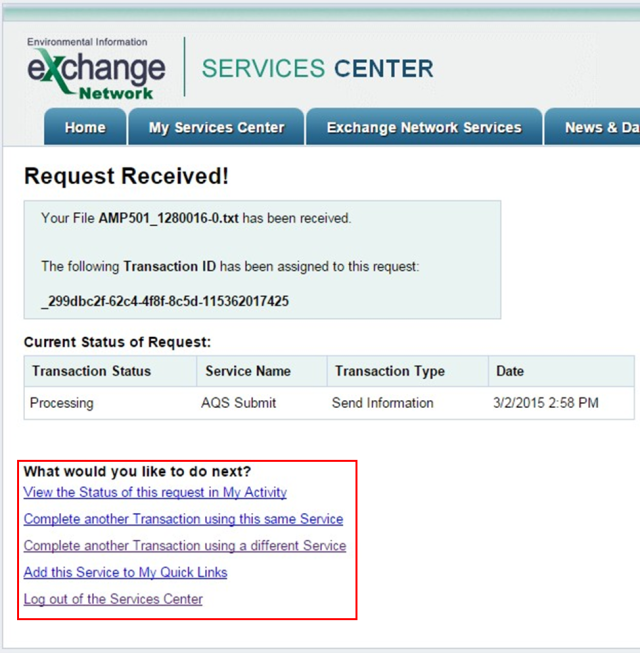
The screen will display the status and a transaction ID. From here the user can select a link under the 'What would you like to do next?' header. An email, from cdx@pa.gov, containing the file transfer information will be sent to the email address or addresses the user input into the 'Enter Sender's Email Address to Notify of Transaction Status Changes:' field. AQS will also send the user (to the address AQS has on record) an email summarizing all processing with links to reports.
Job Status
The values for the Job Status reflect how the batch job ran. They are:
| Ran | Job Completed |
|---|---|
| Not Run Yet | Job has not run yet. |
| Failed Before Run | Some error occurred that caused the job not to run. User should contact support. |
| Failed During Run | Some error occurred during the execution of the module. User should contact support |
ENSC Subsequent Uses
After the initial submittal all subsequent submittals can be processed through the 'My Service Center' interactive window. After logging into ENSC the user will select the My Service Center tab or click the 'Go' button on the Interactive Window area labeled MY SERVICE CENTER.
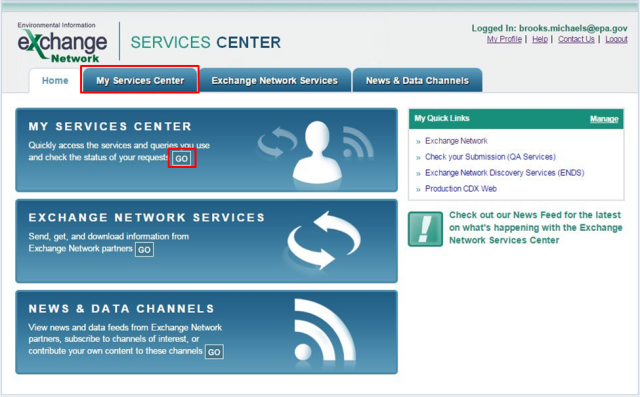
This will open the My Service Center interactive window.
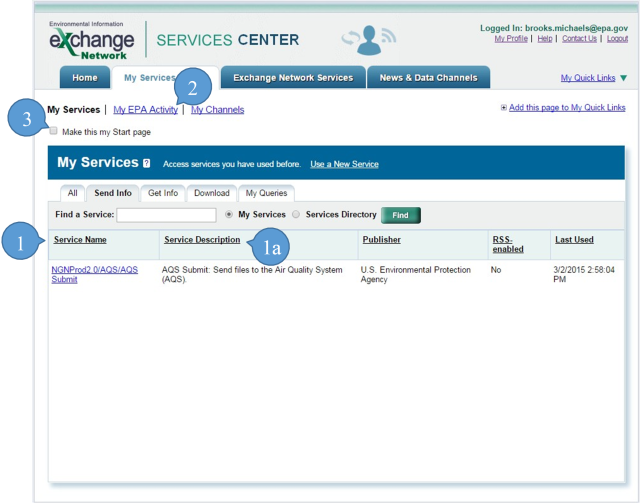
- To Send data to AQS the user will select the 'Service Name' ending in AQS Submit.
- The user should verify that the 'Service Description' shows AQS Submit: Send files to the Air Quality System (AQS).
- The user can see previous submissions by selecting the 'My EPA Activity' link.
- The user has the option to make this page the Start page, reducing the necessary steps for submitting data.
